Sometimes we are presented with the opportunity to use the USB debugging function on the Android device, in order to solve any problem, however, what to do when the screen is damaged? Here you will learn how to enable USB debugging to broken screen.
Enable USB debugging to broken screen
As this term of activating broken screen debugging, it is defined with the translation of the English word "debugging", it is defined as the process carried out to search for solutions to different computer problems; In this aspect, mainly Android mobile devices.
It is very common that most of the applications related to the Android operating system are created with the program called "Android Studio", it can be used on a computer. From the very moment in which the transmission of said application is decided in order to test it on the phone, it is essential to transmit it and see the function of its code.
It is here at that very moment that activating USB debugging on a broken screen becomes important, since it allows connection to our mobile device, a computer and gives us the security that it works correctly. This is possible thanks to the content of USB cables, because they allow the debugging process.
Apart from the aforementioned, the way in which it becomes known is the ability to take information from the phone itself to the computer or in the reverse process.
What is USB debugging for?
As we explained in paragraphs above regarding the primary function through USB is that it allows the relationship through a connection between the computer and the phone.
We must keep in mind that each device is different, however manufacturers always offer tools in order to carry out the process, such as the world-famous case of "Samsung"; since it has the Odin debugger, cataloged as one of the best in terms of this topic.
Although we are told that Odin is usually impressive, it is no less true that it is limited only to devices generated by the Samsung company as well as those of other manufacturers. For this reason, the debugger that is best known in the world has become ADB (Android Debug Bridge), this because it is the one that has been most developed in Android.
It is worth noting that this process of activating USB debugging on a broken screen will only work if it is active on mobile devices. All of which happens to be very important and we must place this function in order to use it in the event that it is required.
The casual debugging of certain files such as images in order to be transmitted to the computer, does not generate any problem or risk; On the other hand, the beginning of the modification of the files dedicated to the functionality of the mobile device could cause damage to the software, for this reason it must be done under the user's own responsibility.
Benefits of enabling USB debugging on broken screen
Without a doubt, the highest benefit regarding the process of activating USB debugging for broken screen on personal mobile devices is having full access to the Root installation on the phones; is to enter a saved point as a backup and transmit the information.
This debugging process is really very powerful, since it achieves the transformation of the cell phone software into that of a totally different one, it can fix problems that cannot be solved in any other way, as well as completely flash the phone so that it is in mode factory or what is the same as if it had never been used.
Disadvantages of enabling USB debugging
Although this generates many benefits, it is also important to keep in mind that like everything there is a negative part. As a first point, it is recommended to activate the function if you do not have the necessary basic knowledge in computer matters.
Another point to take into consideration is that keeping it active at all times does not generate many benefits, only those that we have already mentioned. The actions called flashing or booting are carried out sporadically and do not need to be done every so often, so it is not necessary that it be activated at all times.
Another type of disadvantage in relation to this is security, because in the event that the Android mobile is constantly activated, the debugging mode is simpler and access to it is easier and to the data that is backed up in his memory.
How to activate USB debugging to broken screen in normal cases?
As we have already mentioned, activate broken screen USB debugging is a great tool which is located on any phone that has the Android operating system, and in the most current models it already represents almost one hundred percent that they all have one.
The main reason why it became necessary to put the debugging mode on most phones is to make sure that the applications run without any problem.
As wise advice, we must remind the reader that when you want to activate the debugging mode, you must be very well informed of what is available in the version that corresponds to the user's phone; in Android the version is 4.2 or higher; other than that it is much easier than you think.
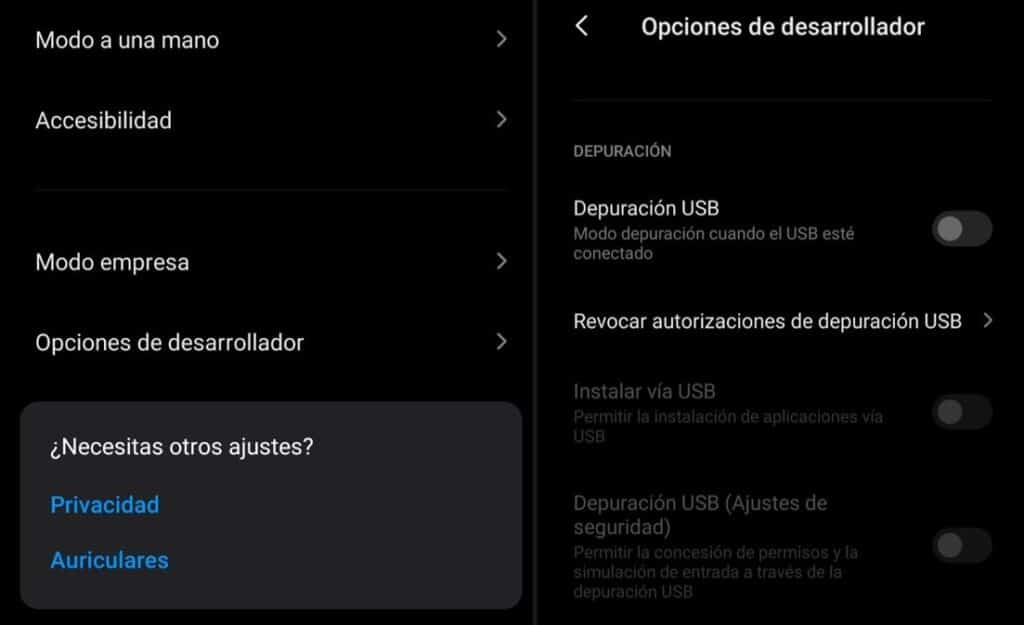
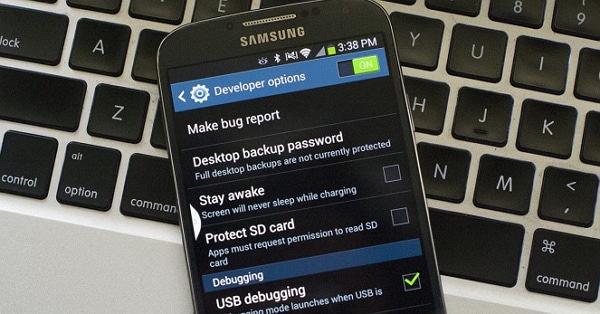
In case the cell phone is in perfect mode, the only step to take is to go to the "Settings" area, which is located internally in the Android phone. As a later step, you have to step on the touch screen in the area where the compilation number appears, this process will have to be repeated until the development options appear.
Once we manage to get to this step, it will be possible for us to move on to the process of activating USB debugging on a broken screen quickly and easily, in this way we will be able to install applications installed on the computer, flash the phone and even boot it.
Other information to keep in mind
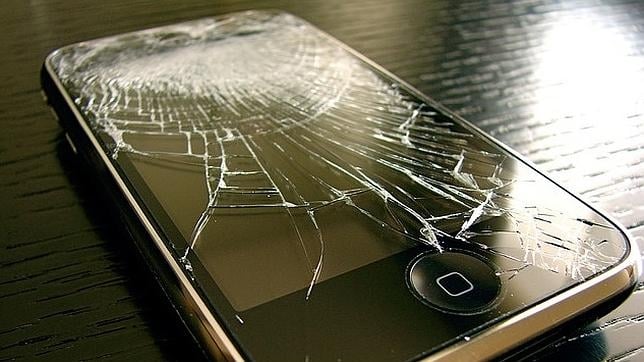
On the other hand, there will not always be a good quality device, so it is equally possible that some damage may occur in the same way. Let's take as an example that the touch screen of the device is completely damaged, and it is not possible to enter any type of menu, or manipulate it in any way.
In relation to this things are complicated for us and it is a very unpleasant moment; then we could ask ourselves how to recover the data? For this the only way out is that you can still activate the USB debugging mode even if you have a broken screen.
This will be possible as long as the phone files continue to work and by that we are referring to the processor, the base board and the BIOS memory. There is also an option to recover the information that is recorded on the phone through the process of activating USB debugging on a broken screen.
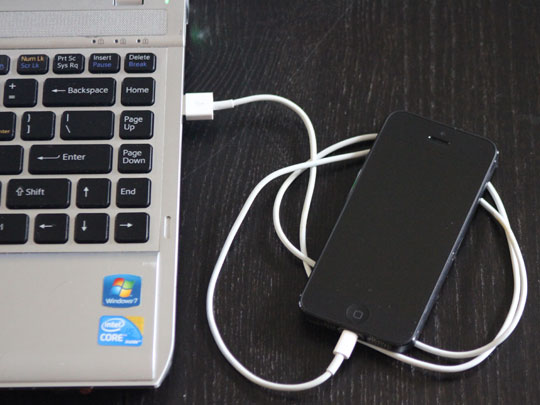
To carry out this process, external tools will be needed and many times it will become a bit more complicated to find a way to activate debugging. In order to activate it we need a USB cable, the personal mobile device with the damaged screen and a computer.
One of the best ways to achieve debugging mode activation on a broken Android screen we can expose the following:
Data recovery from damaged device via dr.fone
Most of the people feel fear the moment their mobile device or phone gets damaged or broken as most of them think that all the data stored on it will be lost. The above is not generally the case, there are ways to access most of these files that are inside the cell phone.
In relation to this type of inconvenience, some tools were designed that serve to recover said data, and for this we are going to touch the option called Dr.fone. This option has the advantage of being able to retrieve some of the most common software and debugging access without requiring prior approval from the phone.
This type of tool has important and great features and functions, which we can mention below:
It allows direct access to the internal memory: this regardless of the damage to the phone in relation to the hardware, with it it is possible to collect a quantity of data that was stored in the memory and can be retrieved on the computer.
It is not necessary to activate USB debugging: it is possible that this is the most particular data of this type of software; because USB debugging is not required to get the files out.
Easy to master and very intuitive: even a person with limited experience should be able to recover files just by watching a video tutorial, because the application is not difficult and the options are straightforward.
Next, we will present the steps to follow with the previously determined purposes, which are:
1.- Download and start the software
As a first step you should search for the official software of the dr.fone – Recover tool; We can do this from the Google bar directly by typing the Dr. Fone option.
Once we have found it, we will do the next step, such as the download and when it is being installed, click on the "Run as administrator" option, so that the program can perform all the functions without being limited by the system itself. .
As a continuation of the process we will select the "Recover" button, it is found internally in the application menus. In this way the program automatically takes care of detecting the device or phone and then you will see the option that says "Recover Android data", click on it and continue.
2.- Select data types and choose the fault
Once the previous step is complete, we choose which files we want to recover on the phone with a broken screen. We must also say that in a certain way the software of the Dr. Fone tool will indicate all the available files in terms of the recovery process, however this can be modified if the options that only interest us are unchecked.
It must be remembered that the more files there are, the greater the delay time will be, in this case we must select what types of files may be old and they can be abandoned so that the process is faster.
After this we will choose a failure, it must be the content on the mobile, such as "I do not have access to the phone" or the "touch does not work" option. In the case at hand, we must bear in mind that the screen is broken, and the "Black/broken screen" option must be selected.
When we already select the error or failure, we will choose the device model number and name. There are a large number of models, however the most common are the Samsung Note and S series entirely. As a last point, we must be sure that both the model and the selected device are the same, because if we make a mistake we can find errors in the files.
3.- Enter the download mode and download the recovery packages
Once we successfully remove the files from the Android mobile, we must enter the download mode, we can do this by turning off the phone and pressing some buttons in a certain order. For the most part, that order is found like this: volume down, power on, home. The three buttons will be pressed at the same time and keep pressed.
After that, a notice will be presented where the functions are specified in their entirety and in this case we must click on "volume up" in order to find easy access in download mode. It must be taken into account that since the screen is broken, the aforementioned steps must be followed with total responsibility, in order to achieve the success of the process.
When we enter the download mode, the Dr. Fone tool will send a notification accepting that the phone recovery packages have been found, which will be downloaded later.
4.- Data recovery
Once the download of the recovery packages is completed, the files will still be recovered using the file preview option. Once this step is done, we select the "Recover" option and in this way begins the decompression of the data that has previously been decided to obtain from the broken screen phone.
Enable USB debugging to broken screen via OTG and mouse
Another method that is highly recommended in order to activate USB debugging on a broken screen is that the screen is damaged, for this we will use the well-known USB OTG method and the USB mouse. It is worth noting that this method is done once the touch screen has been damaged, it does not occur in cases where it has been hit and nothing can be seen inside the equipment.
The function is achieved using the USB mouse as a cursor, it is presented on the Android cell phone, this allows us to control the device without the need to use the touch. If we want to put this method into practice, we must follow the steps mentioned below:
1.- Check compatibility and download OTG
The first step is to make sure that the phone has compatibility with a USB mouse, apart from that it must allow OTG.
For the most part, almost all modern phones currently allow these two options, however, if the desire is to be sure; It is necessary to investigate in order not to waste time using a method that later does not work on the mobile.
Another important step is the download that allows the OTG to be detected, they are available in stores such as the Play Store or APK. Such an application has the purpose of allowing control of the mobile, even if the touch screen is totally inoperative.
Finally, it is good to mention that the mobile screen must be kept in correct condition or at least with the capacity to allow some of the content. The OTG allows to activate USB debugging to broken screen, even if it does not work in terms of touch; however it will not be of any help as it will not be possible to see what needs to be done.
2.- Go into settings and activate debugging casually
When we get to this point, the phone will use the mouse in a way that the mouse will perform the functions of the touch system, where the right click will have a function equal to touching the screen. We will have to follow the common instructions, and after that we will go to settings and click several times on the build number.
Once the menu appears, USB debugging is activated, we achieve this by clicking on it and the Android phone should let us copy the files to the computer.
Enable USB debugging to broken screen using ADB commands
Similarly, when we want to activate USB debugging, we can still rely on ADB commands, if the phone is in a serious situation or the touch screen is damaged. All devices have an "SDK" tool, even within it there is another called "ASB". These tools have the function of helping in the connection of the mobile and the computer.
If we want to activate USB debugging with a broken screen and using ADB commands, it is necessary to follow the following steps:
1.- Download/install ADB and start the boot commands
First we proceed to download and install the ADB commands on a computer. Once they are downloaded, we proceed to install them on the computer and connect the device with the broken screen through a USB cable.
2.- Choose the type of commands and make a backup
Later and after this step, we will write in the computer software "adb devices" as a command, at the same time the mobile must be connected in recovery mode. Then we will put a longer command: “adb pull / data / media / ClockworkMod / backup ~ / Desktop / Android-up”.
What the two aforementioned commands do is allow the extraction of the phone from the data that is stored in a safe way on the computer that is being used.
Once all the commands are finished loading, all the data on the phone should be stored on the computer's hard drive, and that is where we must look for them specifically in the "recent files" folder.
3.- Take risks into account
This method might seem very simple and with fewer limitations, however we must say that it is much more complex than it seems. The fact of activating USB debugging through a command, should be done only if we have the knowledge for such a procedure.
The first thing that we must take into consideration is that we can carry out this process only once, in case a failure occurs due to our error, it is necessary to try another different method.
If we use the ADB commands, there may be a risk that the mobile may be permanently damaged, and this cannot be solved with a boot or a flash; then we must have the necessary knowledge when doing the procedure.
We recommend the reader to also review:
Mercantile Registry in Venezuela: Full Summary
Control system: Everything You Need to Know