Throughout this article we show you the correct way to How to install Windows 8.1 step by step and correctly? All the details! The best and fastest way to know the process. Come and enjoy this useful tutorial with us.

Install Windows 8.1
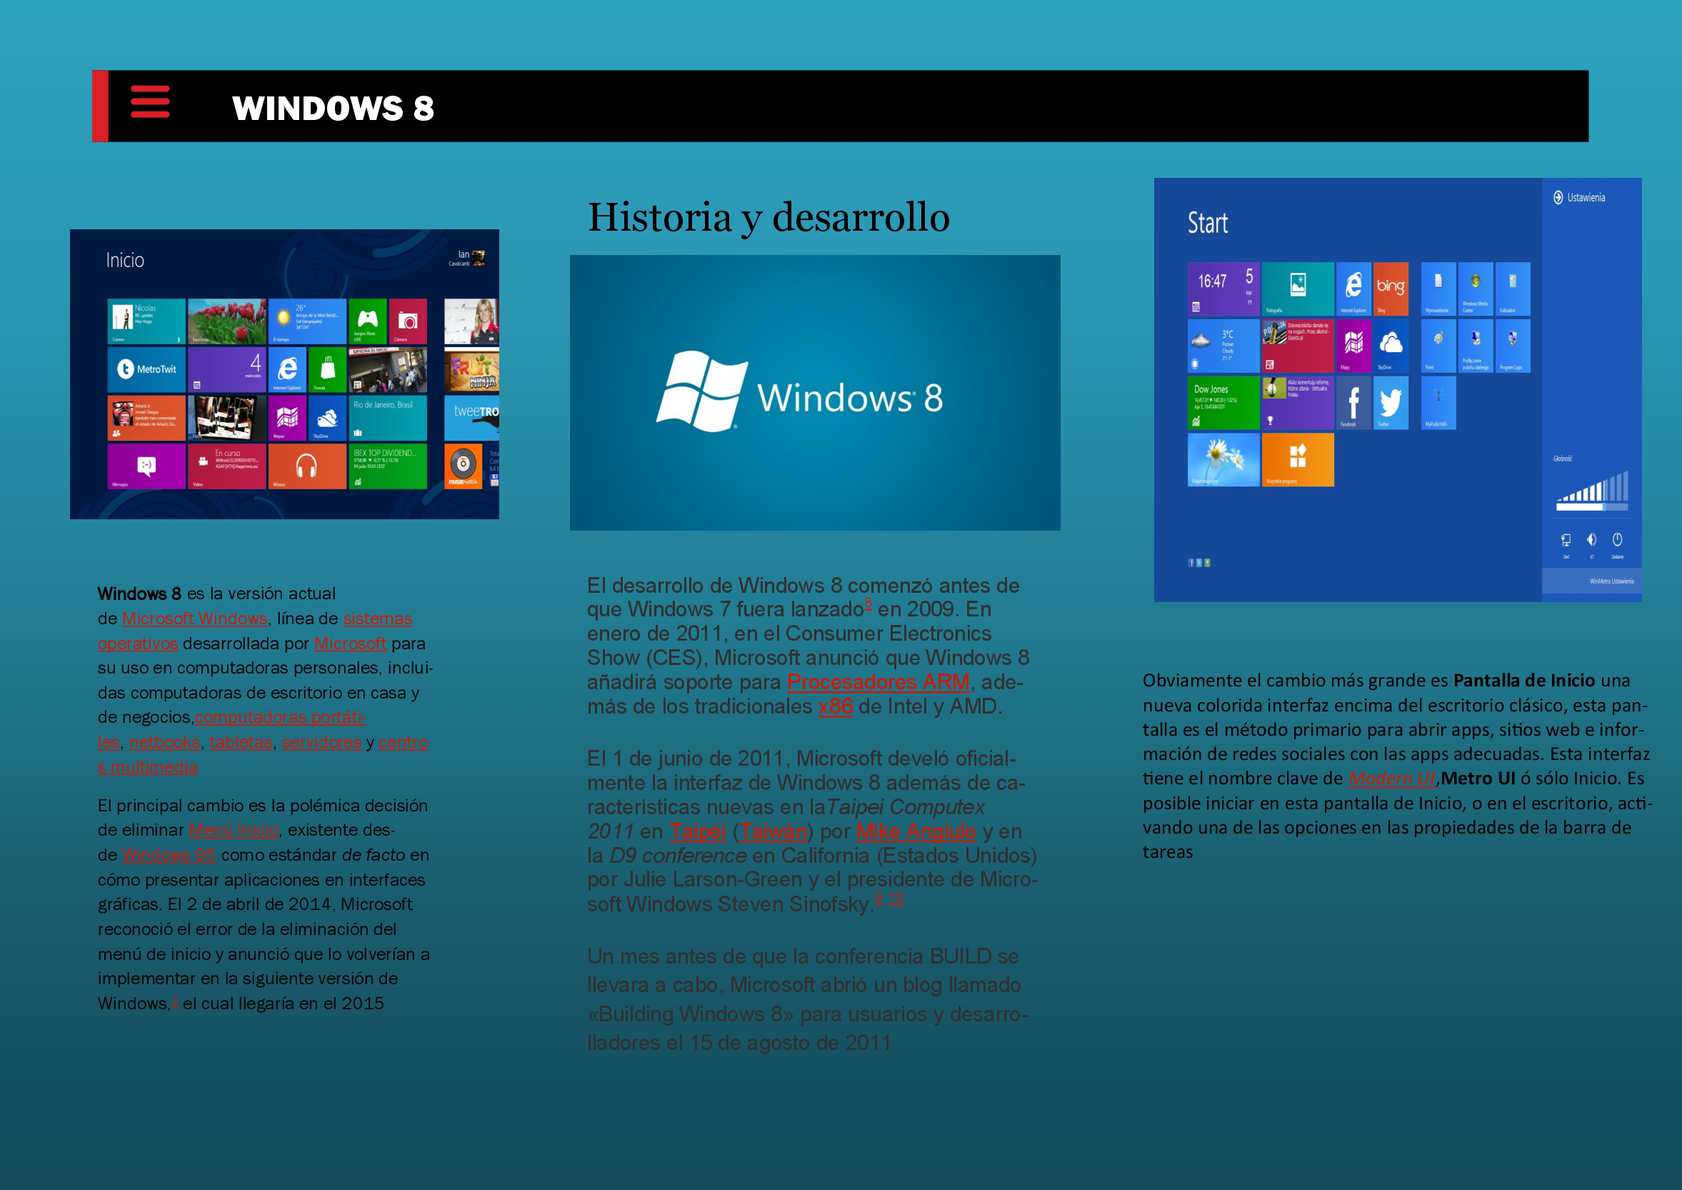
Speaking a bit about Windows 8 of its first advances, this started before Windows 7 was exposed in 2011. The Microsoft company announced that Windows 8 would include support for ARM processors in addition to the usually known ones that were from the Intel brand and AMD. In the same year the company exposed the Windows 8 interface and certain additional features. This also opened and started a blog called Building Windows 8 for developer users.
The Microsoft company certifies at that time the novel quality for Windows 8 that it gave to position itself and that is why they launched another information compilation platform for developers. In that year they indicated that there were more than 500 thousand downloads from that interface. Then on August 1, 2012 they announced a new RTM version of Windows 8, then they released a copy of the final version of Windows 8 Enterprice which was 32g and 64g.
There are relatively few changes compared to the final version of Release Preview. It contains tutorials that explain how to use the new Metro interface, and subtle changes have been made to the desktop to make it more consistent with the Metro interface. Some applications that were already there have also been changed.
Similarly, one of the directors of this company announced that this new version would not be launched due to bugs and that it would harm Microsoft.
Features
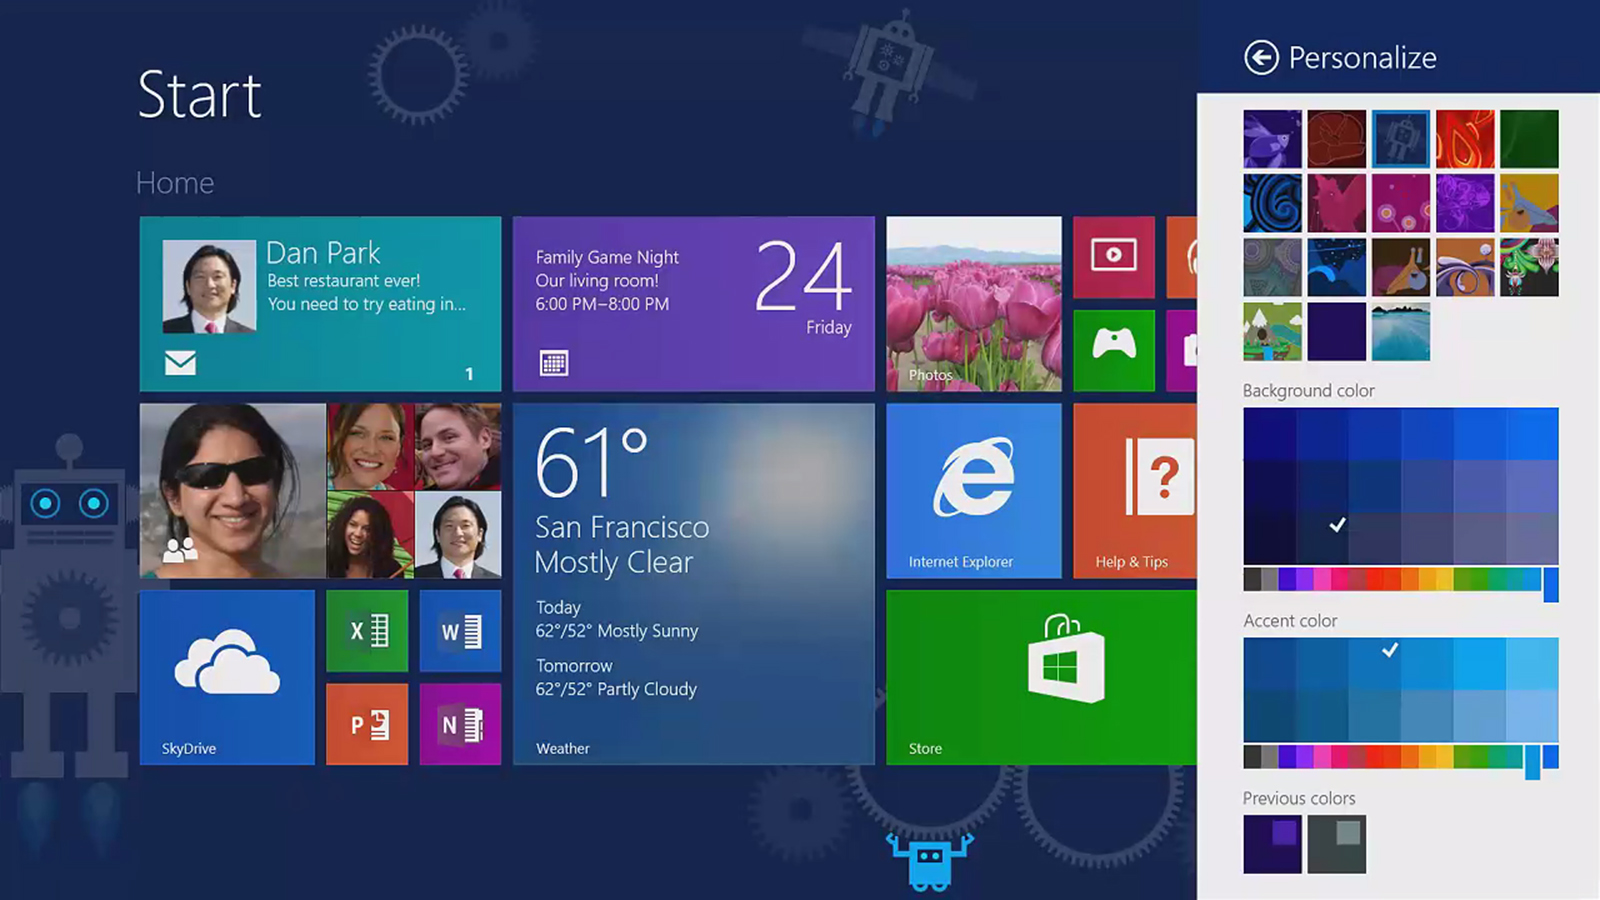
The most significant change is the home screen, which is the new color interface on the classic desktop that is the primary method of opening applications, websites, and social media information with the appropriate applications. The interface codename is Modern UI, Metro UI, or Start only. You can start on the Start screen or on the desktop and activate one of the options in the properties of the taskbar.
One designer described the ModernUI interface as the opposite of advanced users. You can open the desktop by clicking its own icon, and you can use the same desktop background on the home screen. When the screen resolution is lower than 1024 × 768, this interface will be disabled.
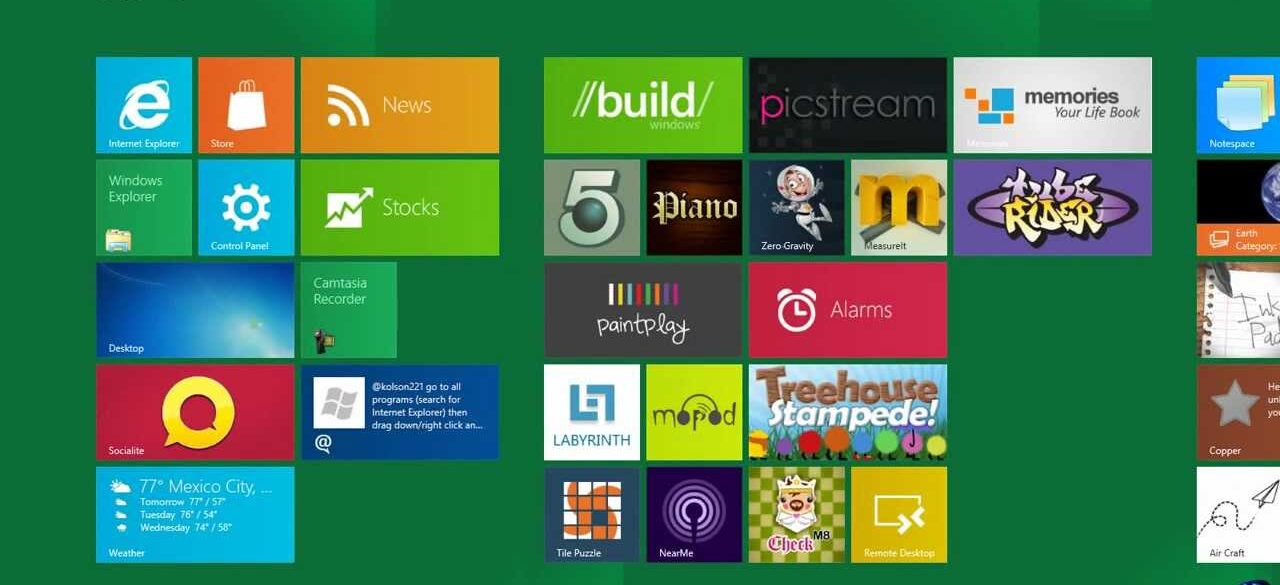
It also brings new applications are exclusive utilities for Windows 8. They occupy the entire screen and can dock up to four on the same screen. You can use the X in the upper right corner to close them. They can also be changed with Alt + Tab to prevent the touch screen from touching the upper left corner of the screen. Both modern and classic desks can be used.
Its icons can be rectangular or square and can vary in size, group and display notifications. These applications close after a few minutes of inactivity (a trick to force close the application is to move the mouse pointer (or finger) to the top of the screen and slide it down. In the start menu this has been removed and its function has been replaced by the "Home" screen and the bar.
There is a list of five commands on this bar: Search, Share, Change Classic Desktop, and the Start Device and Settings button. The series program that contains the command was structured to display certain installed programs in the foreground. Second is a complete series of programs and commands. In April 2014. Microsoft asserted the bug of removing the start menu and stated that it would be redeployed in the next version of Windows.
Internet Explorer 10
In addition to being included as a touch application, and at this time it can be used as a desktop application. Today it is compatible with HTML5 and CSS3, including platforms such as Adobe Flash Player.
Onedrive
At this moment there is an app to look at your files in a faster way in this application.
Lock screen
Customized by the user can send notifications and protect the device against unauthorized use. In addition to the date and time, up to six apps can display their notifications here. Use mouse or finger to drag up and delete it. It appears by pressing ⊞Win + L, and the latter cannot be disabled before logging in.
Changes to the classic desktop
File Explorer now has an interface that makes previously hidden functions accessible (or fingers on the touch screen). The Windows 7 taskbar remains, but its notification has been moved to the upper right corner. Native driver for reading and writing Blu-ray data discs (BD-R) whereas Windows Media Player no longer supports DVD.
Gadgets and sidebars
Gadgets, small applications and RSS for notification operations first appeared in Windows Vista and continue to exist in Windows 7. However, in this version, due to serious vulnerabilities, they are completely prohibited.
Some old messages included the blue screen of death, the verification and modernization of the disk have been brought up to date with softer fonts and simple designs. Some versions support the Windows To Go function. They are compatible with natural USB 3.0 and support for previous versions.
Windows 8 will no longer necessarily install these games. However, in addition to being able to install standalone games from the Windows app store, these games can still be used on the Xbox platform through Microsoft's extended account 38 from the catalog.
Disk image
From this operating system, it is possible to mount the disk image as a virtual drive. Synchronization Like Microsoft Office 2013, Windows 8 now allows you to improve user settings and preferences through the use of a Microsoft account. Allows you to transfer settings on any computer.
File History
This feature concentrates on the previous version feature provided in Windows 7 and regularly copies library copies to USB storage or external hard drive. This function has nothing to do with the system image. You can also restore your Windows 7 backup in the "Windows 7 File Recovery" section.

Paint
Although the Windows drawing tool still exists when installed, a new application called "FreshPaint" is still generated, which extends and modernizes the drawing system.
Ribbon interface
The command menu system was first introduced in Office 2007, improved in Office 2010, and has now become part of Windows Explorer. As in the Office suite, new tabs appear along with the characteristics of the folder types.
Then in 2013 Microsoft released the free version of Windows 8.1. In this article we will try to make some concepts as simple and accurate as possible, and that they can be easy and quick to perform effortless installation of Windows 8.1 on computer.
We are going to take advantage of this tutorial on how to learn to install Windows 8.1, so first of all it is essential to make the partition, to see where we want to install Windows, and for that we must format the disk. However, when repairing the computer, the first thing we learned was to make sure that the component that most caught our attention was the installation of the operating system. Something new, something that we do not know.
How to install windows 8.1 with a USB?
The first logical step is to start Windows 8.1 DvD or bootable USB Flash Drive. To this end, we have prepared two articles in which you will learn how to boot from a bootable USB or Windows 8.1 installation DVD. Boot Windows 8.1 Installer Alright now that we have a bootable USB stick or Windows 8.1 installation DVD, it's time to start how to install windows 8.1 step by step.
Steps to start the installation
After completing this operation, a classic Windows 8 image will appear. We wait for the installer to load for a while and then continue with the following operations:
- Installation screen where 8.1 appears In this window we select the language, the currency and the time format, and the type of keyboard that we will use in this case Spanish, Argentine and Latin American.
- They then indicate the installation options screen.
- We click Install Now to begin the Windows installation, and then we wait a moment.
- In the next window, we mark the checkbox to accept the Microsoft license terms and then click Next.
- Here two options will appear: the first is to update the version that we must have to a higher version, which will never be available, so we will choose the second option to perform a new custom installation of Windows 8.1.
- Here we stop for a moment since you have to be very, very careful.
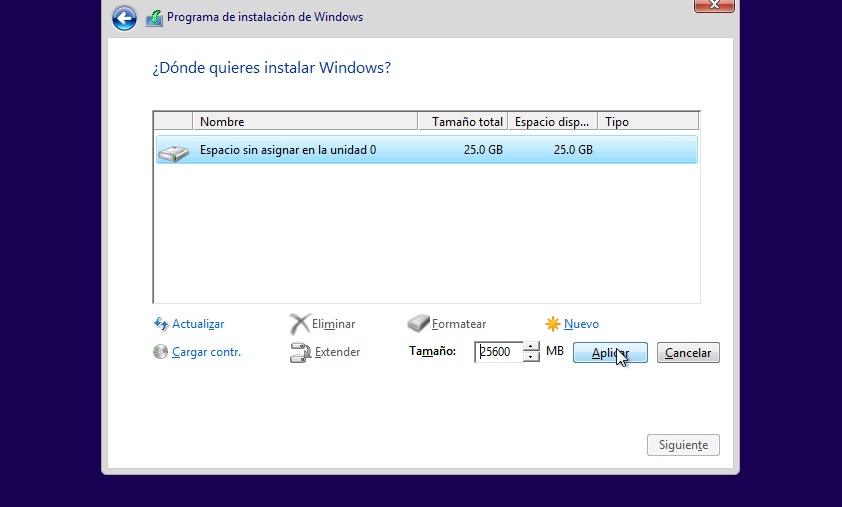
Windows allows us to create our own partition and determine the location of Windows and the location of the data on this screen. The image you see is the hard drive, if it is partitioned, and with all the data. If you erase the partition, all the data on that partition will be erased, and if it is formatted it will be erased as well, not to mention erasing the entire disk.
We first install it on a virtual hard drive and allocate no more than 25GB of space. It is not a real compact disc. We use a virtual box to complete it. There cannot be a compact disc that small and it is working these days. So suppose we have such a large physical disk just to understand the concept without worrying about its size because it is enough to install Windows.

We also note that it represents the unallocated space with zero units. This means that the hard drive on which we plan to install Windows is not partitioned and unformatted, which means that we still cannot fully load anything onto it.
Now is where we start and we are going to learn how to partition the disk. Merely divide the disk into the parts we want, each part has letters assigned or not assigned and voila. it remains only to create and save data after formatting. Usually two partitions are created, one for installing Windows and the other for data. So when the system is damaged it is easier to recover them and identify the partitions that are important to us.
From here also began the famous partition or partition drive C: and D, this is the classic partition that we find in the computer and also the most convenient partition, because unless the disk is divided into more than two systems it is not convenient to divide the disc into two operations.
Before proceeding we conclude that white space and unallocated space on the disk can only be used before creating a partition of the total size of the white space or less. If it is smaller it will create a partition that can be occupied and the remaining space will not be occupied. If a partition created linearly after empty space can expand and occupy all the space, then leave the largest partition and the unallocated space completely occupied, that is, expanding it.
Windows 8.1 disk partition options
- Update: It is used to update the screen since the disk can be connected and disconnected hot, so if we want to connect another disk, we can update the screen.
- Delete: Used to completely delete a partition, regardless of whether it has data. Delete it completely and leave an empty space unallocated.
- Format: This allows you to format the partition, that is, to delete all the contents of the partition, ready to use at any time. This option will delete absolutely all the data on the partition which is necessary if you want to use the partition to store data as it will require you to format it later.
- New: Create a new partition if it is the first partition on the disk it will automatically create an additional partition for you, because it is based on the partition reserved for the system containing Windows, that is, except for your partition. In addition, windows reserves a partition ratio of approximately 350 to 500 Mb in Windows 10.
- Driver loading: If the hard drive is not detected and it is not due to physical problems (usually on old boards and windows), it can be detected using the manufacturer's disk drive that is updated via USB or CD. The drive is loaded.
- Expansion: If continuous unallocated space remains after the partition is created, this option allows all the space to be used for the same partition, that is, it is expanded to increase its size.
Now all we have to do is implement the content described above to install Windows. Let's click New and assign the required size to the partition. The size of the Windows installer is in megabytes so let's remember: 1 megabyte = 1024 megabytes.
Now a partition will be created, it takes the entire size of the disk. In other words, after clicking new, I set a size of 25,000 Mb, and then click apply. This image is the example of this.
The best practice on the real disk is to create a 100GB partition for Windows and the remaining space to create another partition for the data. For example if it is a 500Gb disk, they will click again, 100.000Mb will be allocated, they will apply and they will have two Windows partitions, 350mb and 98gb for the partition they created. Since windows the partitions it creates are divided a bit. If they are not assigned, they will have 400 Gb left.
If you put new ones and apply them right away they occupy all the rest of the disk as data, then you will have a 100 partition and another 400 partition.
It should be emphasized that if you click Next without creating any windows partition it will automatically create a partition for us, and your reserved partition will take up all disk space and format it. As shown in the image we create the windows partition so that we can see it and it is not automatic, it will allow us to choose where we want to install Windows. Logically we will install it in a partition that shows 24 GB. Then click next.
The installation will start the computer will restart several times, there is no need to re-enter the installation program, and Windows must be allowed to perform all operations, and if they choose to automatically load DVD or flash drive in the BIOS, they must be loaded the first time to reboot computer hard drive.
If we want to know more about parts of the windows desktop, enter the following link:Windows desktop parts
Once the installation is complete, a new configuration screen will appear that will allow us to select the color and the name of the equipment, and then click Next. Quick settings are used here.
On this screen, they can choose to send an email to Microsoft or go back to the old local Windows administrator account. At this point Microsoft has slightly hidden this option because they make it easy to sync your email with the app, but to be honest, entering an email password every time you start Windows is cumbersome and annoying.
Let's choose to create a new account. Click Sign in without a Microsoft account.
Now, you are about to create your own local account, with or without a password, just like we did in Windows 7. Once done, click Finish, you're done!