Photoshop is today the most widely used tool for digital image editing. Do you want to know how invert colors in Photoshop? Come and find out in this new article.
Invert colors in Photoshop
Photoshop is a design tool that allows you to create and manipulate documents and files in a versatile way. It offers multiple general editing tools, including: selection, creation and cutting of sectors, measurement, retouching, painting, drawing and text, and navigation.
To know the characteristics, functions and other aspects of this interesting tool, I invite you to read the article what is Photoshop.
Some settings, such as retouching and painting, refer specifically to editing the colors of images. Next, we will give you details about the different ways to invert colors in Photoshop.
Invert colors
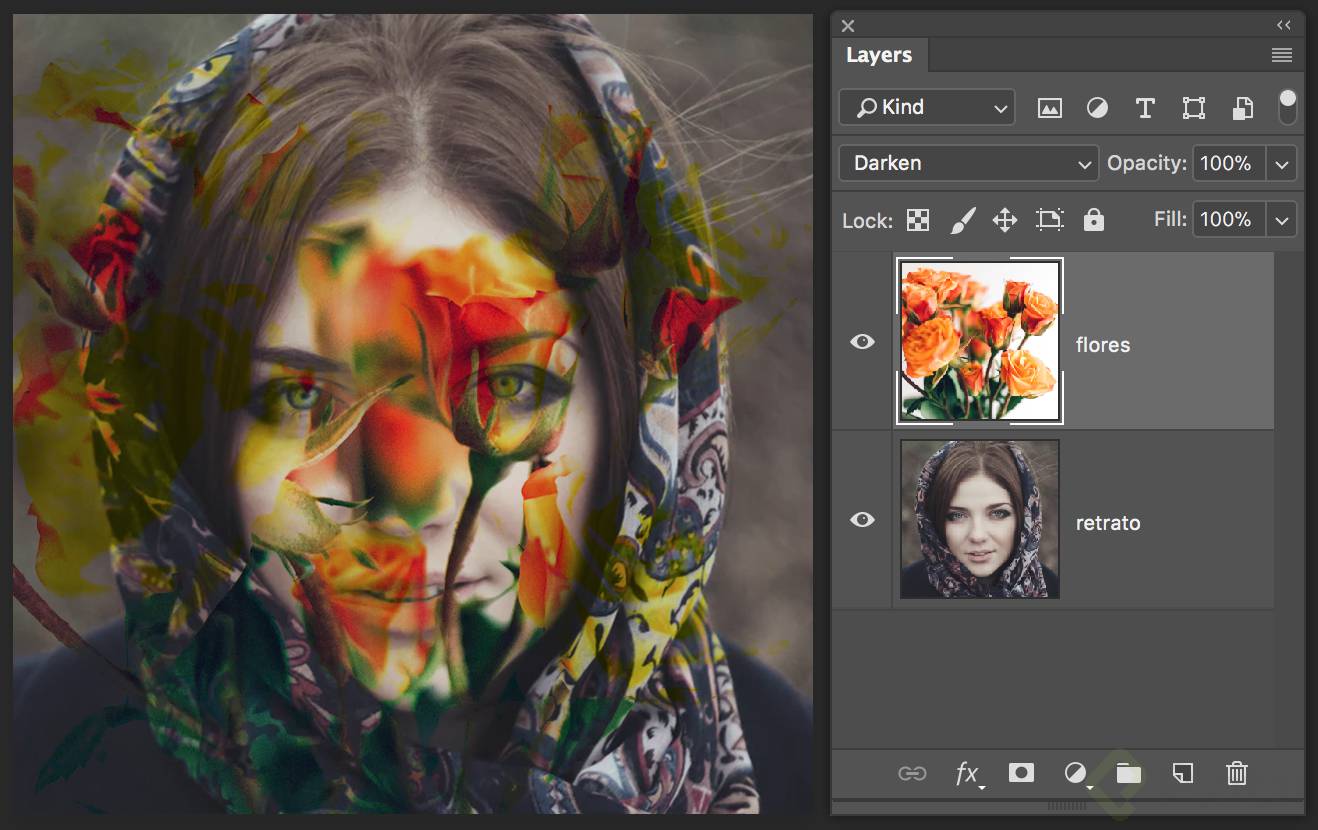
To know how to invert colors in Photoshop, this option is a special effect application, which allows you to create an edge mask to apply focus or make specific adjustments to certain areas of an image. Regarding this particular fact, it is necessary to note that the colors of a negative scanned image cannot be inverted, that is, it is not possible to obtain an accurate positive image from it.
There are two ways to invert colors in Photoshop, both ways are achieved in a few steps. In the settings panel, the first thing to do is select the Invert icon, followed by the following sequence: Layer> New Adjustment Layer> Invert> Ok. Another option is to hover over the image and select Settings> Invert. The disadvantage of this second alternative is that the change is only applied to the image layer directly, losing the rest of the information about it.
Desaturate the colors
With this option in Photoshop, you can convert a color image into grayscale values, without changing the color mode, or the brightness level of each pixel in that image. However, executing this action permanently modifies the original image information on the background layer.
The correct way to use this tool is to select the options: Image> Adjustments> Desaturate.
Using this command gives the same result as using the Hue / Saturation setting, setting it to -100.
Create an image with two colors: black and white
This way of invert colors in Photoshop, converts color images to high contrast black and white images. By defining a certain level as the threshold, pixels lighter than it become white and those higher than it become black.
There are three ways to create an image of this type, these are:
- In the settings panel, which contains a histogram with the luminance levels of the pixels of the active selection, click on the Threshold icon. Inside it, Layer> New Adjustment Layer> Threshold> Ok.
- On the image, click on the Settings option and then on Threshold.
- Above the luminance histogram, in the settings or properties panel, drag the slider to the desired threshold level. This option allows you to observe the changes while they are being made.
Posterize an image
Posterizing an image means specifying the number of tonal levels for each channel in an image, that is, defining the brightness values and then assigning the pixels to the next matching level.
It is ideal for creating special effects on large, flat areas of a photo. However, it works better with grayscale images than color images.
This action can be performed in any of the following ways:
By selecting the Posterize icon in the Adjustments panel, then clicking Layer> New Adjustment Layer> Posterize> Ok. It can also be done directly on the image, by selecting Adjustments> Posterize.
Another way to do this is by moving the key level slider in the settings or properties panel, or by directly entering the number of levels you want.
Downgrade an image
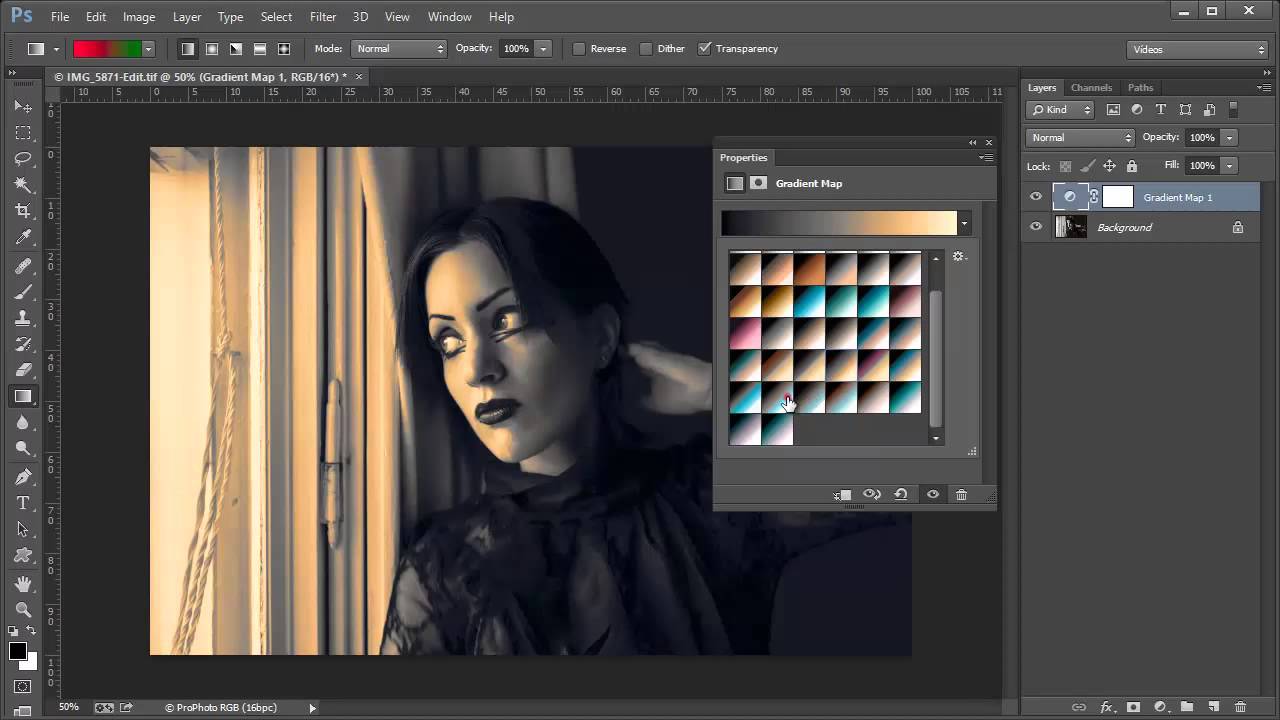
This option is used to create a gradient fill in a specific image. Degradation can be done in two different ways:
Like the previous tools, the configuration is achieved through the Settings panel, in the following ways:
- Settings> Gradient Map Icon> Layer> New Layer> Gradient Map> Ok.
- Selecting the gradient you want from a list of fills included in the settings panel. It is also possible to edit an existing gradient.
- Smooth the appearance of the gradient through the Dither option or change the direction of the fill. It is possible to select both alternatives at the same time.
Main tools for retouching and painting images
The Photoshop Tools Gallery, located on the left of the screen, includes the following image painting and retouching tools:
- Point Healing Brush: It is used to eliminate defects in the images.
- Healing Brush: Paints a sample or pattern, which you use to repair imperfections in an image.
- Patch: Take a sample of the image to repair the imperfections of the same.
- Red-eye brush: Used to remove the red reflection of the flash in the eyes.
- Clone Stamp: Use a sample of the image to paint.
- Pattern stamp: Use a part of the image as a motif for painting.
- Eraser: Its function is to restore parts of the image by erasing some pixels.
- Background Eraser: Used to erase areas, leaving them transparent.
- Magic Eraser: It is used in images with areas of uniform colors, which can be erased until they are completely transparent.
- Blur: Ideal for softening the hard edges of images.
- Sharpen: Used to sharpen the soft edges of images.
- Finger: Blurs the parts or sections of an image that are being selected.
- Dodge: Used to lighten specific areas of an image.
- Burn: Used to darken certain areas of an image.
- Sponge: Used to change the level of color saturation of an area within an image.
- Brush: Ideal for painting brush strokes.
- Pencil: Used to paint lines with hard edges.
- Color Substitution: Used when you want to replace a selected color with a new one.
- Mixer brush: It acts as a realistic paint simulator, by mixing the colors of the canvas and varying the humidity of the paint.
- History Brush: Used to paint a copy in the current image window.
- Historical brush: Used to simulate the appearance of different styles of paintings, by painting stylized strokes.
- Gradient: Used to create blends between colors, including: rectilinear, radial, reflected, angular, and diamond.
- Paint Bucket: Used to fill areas of similar colors with the foreground color.
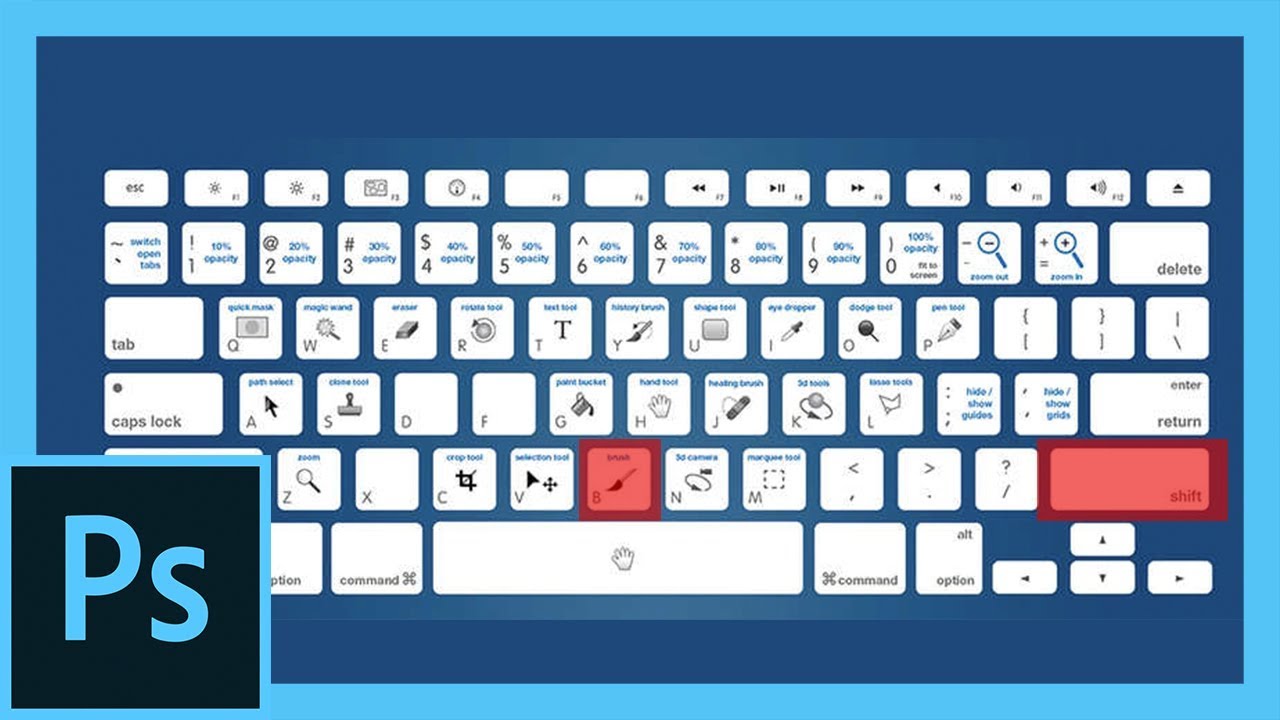
Keyboard Commands Related to Image Editing
Photoshop, like any computer application, allows the use of commands or keyboard shortcuts that facilitate and minimize work time. As for image editing, the main ones are:
- Hold down the J key: Activates the Spot Healing Brush, Healing Brush, Patch, and Red-Eye Brush tools.
- Temporarily press the B key: Used to activate the Brush, Pencil, Color Substitution and Mixer Brush tools.
- Press and hold the S key: Used to activate the Clone Stamp and Pattern Stamp tools.
- Temporarily press the Y key: Activates the History Brush and History Brush tools.
- Hold down the E key: Activate the Eraser, Background Eraser and Magic Eraser tools.
- Hold down the G key: Used to activate the Gradient and Paint Bucket tools.
- Temporarily press the O key: Used to activate the Dodge, Burn and Sponge tools.
- Shift + Alt + B: Used to activate the Color Dodge tool.
- Shift + Alt + D: Used to activate the Color Dodge tool.
- Any paint tool + Shift + Alt + Right Click + Drag: Used to choose a foreground color from the color picker.
- Any paint tool + Number keys: Allows you to adjust the opacity, tolerance, intensity or exposure of the paint mode.
- Any paint tool + Shift + Number keys: Used to set the flow for paint mode.
- Alt + Shift + Number: Used to change the Blend setting of the mixer brush.
- Sponge Tool + Shift + Alt + D: Used to activate the Desaturate tool.
- Sponge tool + Shift + Alt + S: Activate the Saturate tool.
- Number keys: Change the Wet setting of the mixer brush.
- 00: Used to zero the Mixer Brush's Wet and Blend settings.
- Photoshop and the cloud computing
Image editing cannot be left out in today's digital age. For this reason, Photoshop provides the opportunity to manage and synchronize our preferences through the cloud, especially when we work from several computers.
The process is quite simple, you just need to have an Adobe Creative Cloud account. When you enter that account and upload the desired configuration, it is automatically downloaded and applied to the other computer, thus allowing both computers to maintain the same settings.
It is important to note that the configurations that depend on the equipment or hardware cannot be synchronized through the cloud. However, preferences related to: custom shapes, actions, styles, brushes, gradients, outlines, among others, can be adjusted.

On the other hand, Photoshop can share images through a portfolio uploaded to online platforms such as Behance. The first requirement is to create an account on said platform. Then, it is recommended to link the Adobe Creative Cloud and Behance accounts. For this it is necessary to use the same email address in both accounts.
As can be seen below, the procedure for sharing images through the cloud computing is quite simple.
- On the image open in Photoshop, select the option Share on Behance.
- On the screen to enter information, place the name of the image, accompanied by some labels and a comment about it.
- Decide how to share the work, configuring the type of visualization we want for the image.
- Create a cover image. Generally, it needs to be trimmed.
- Select the Crop and Publish option, which will allow the platform to load the image as a project. When this is active, the introduction of general comments is allowed.
- Additionally, while working with the image, you can see its progress through the Behance reviews.
- The option View and Share with Behance allows you to synchronize the information with different social networks. In the following opportunities the image can be shared directly from Photoshop.
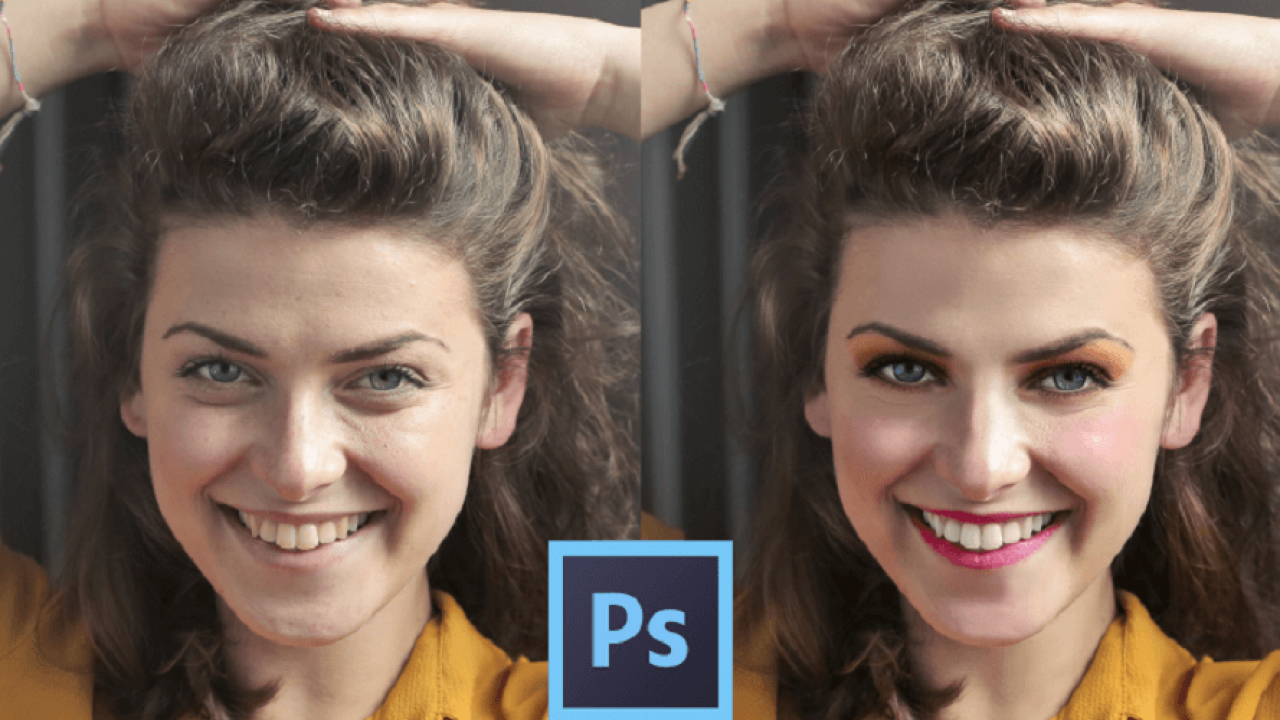
Recommendations for making color adjustments
In general, Photoshop allows you to make lightness, darkness, and contrast adjustments to the color and tone of images. However, to obtain the desired effect, it is necessary to follow the following recommendations:
- Calibrate your computer monitor before starting image editing. This ensures that the image is not displayed differently on other screens or when printed.
- Consider using adjustment layers to keep the color balance in the image.
- If possible, work with 16-bit images, since they lose less image information than 8-bit images.
- Create a copy of the image in another file, in order to keep the original in case we need it later.
- Edit all possible defects present in the image before adjusting the tone and color.
- Open the histogram and information panels in expanded mode, while the image is being edited.
- Apply hue and color changes selectively, that is, make a selection or create a mask.